ARE YOU READY TO GLOW?
Welcome to the ultimate guide for applying your Lily Nails Art press-on nails! Our easy-to-follow tutorial will help you achieve a flawless, salon-quality manicure — all from the comfort of home.
What You’ll Need:
- Press-on nails from Lily Nails Art
- Nail glue/ adhesive tabs
- Cuticle pusher
- Nail file
- Alcohol pad
All tools included in each set of nails
Apply Press On Nails with Adhesvie Tabs
-
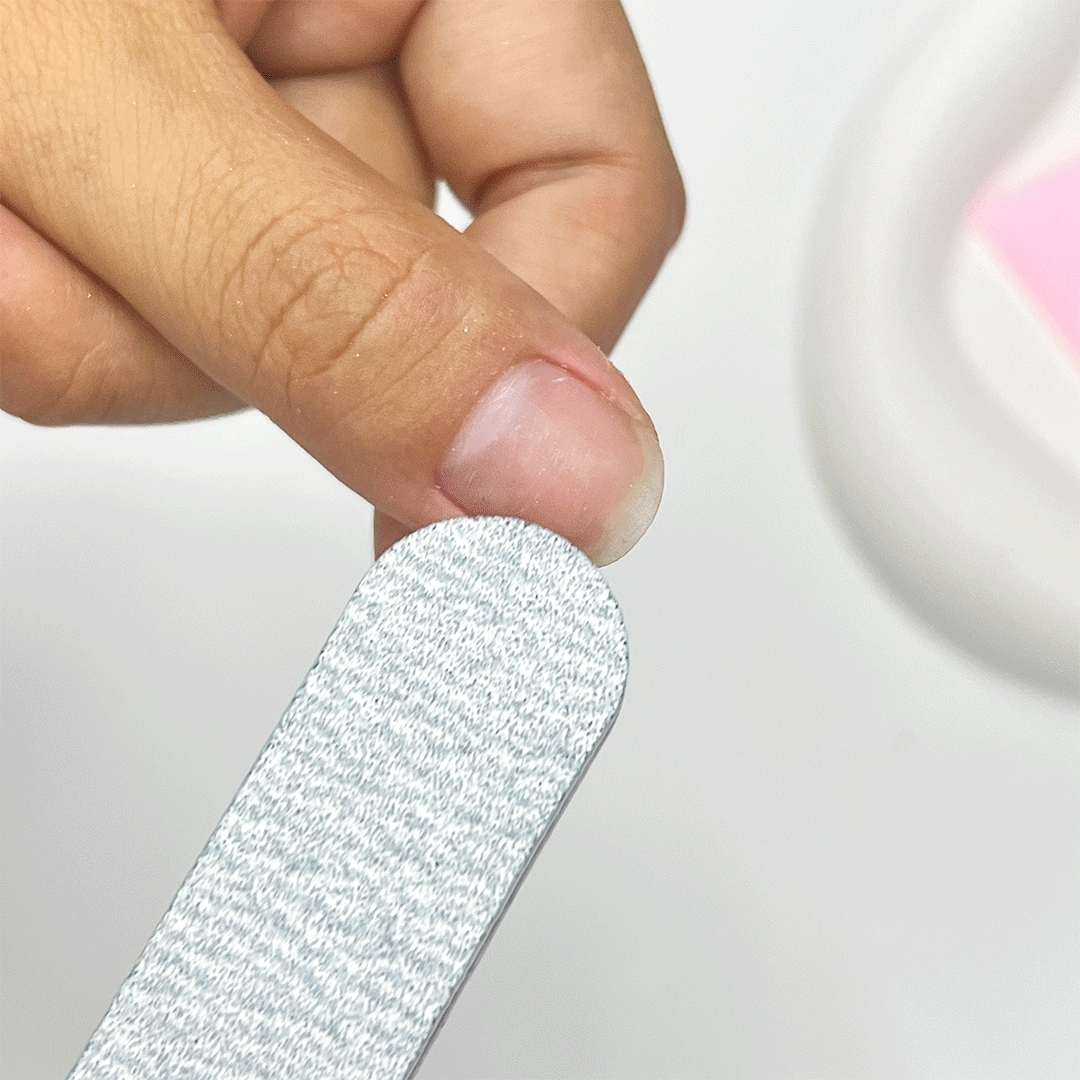
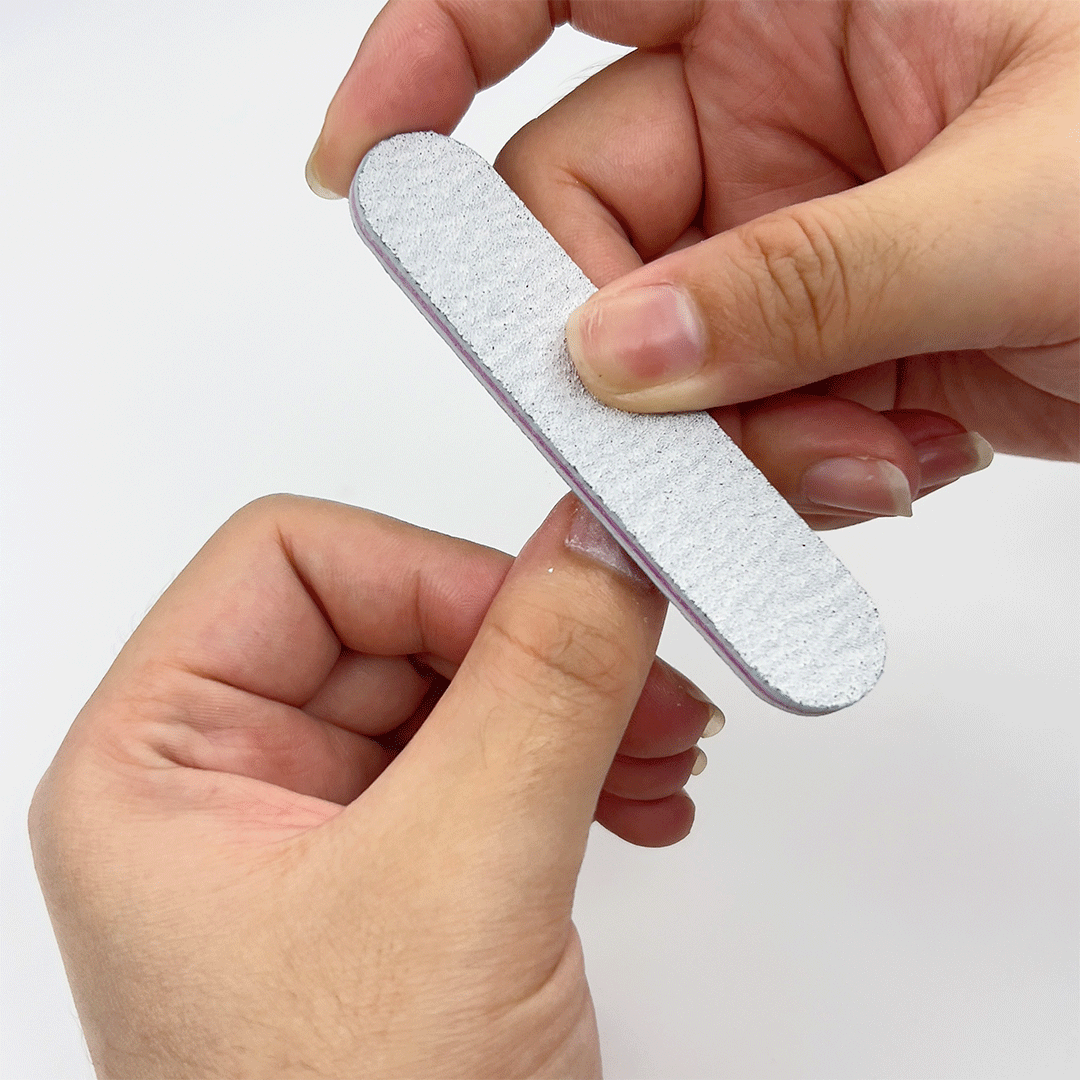
Step 1 - FILE
File your nails, ensuring the entire nail bed is filed to create a rough surface. This step is crucial for helping your nails stay on longer.
-
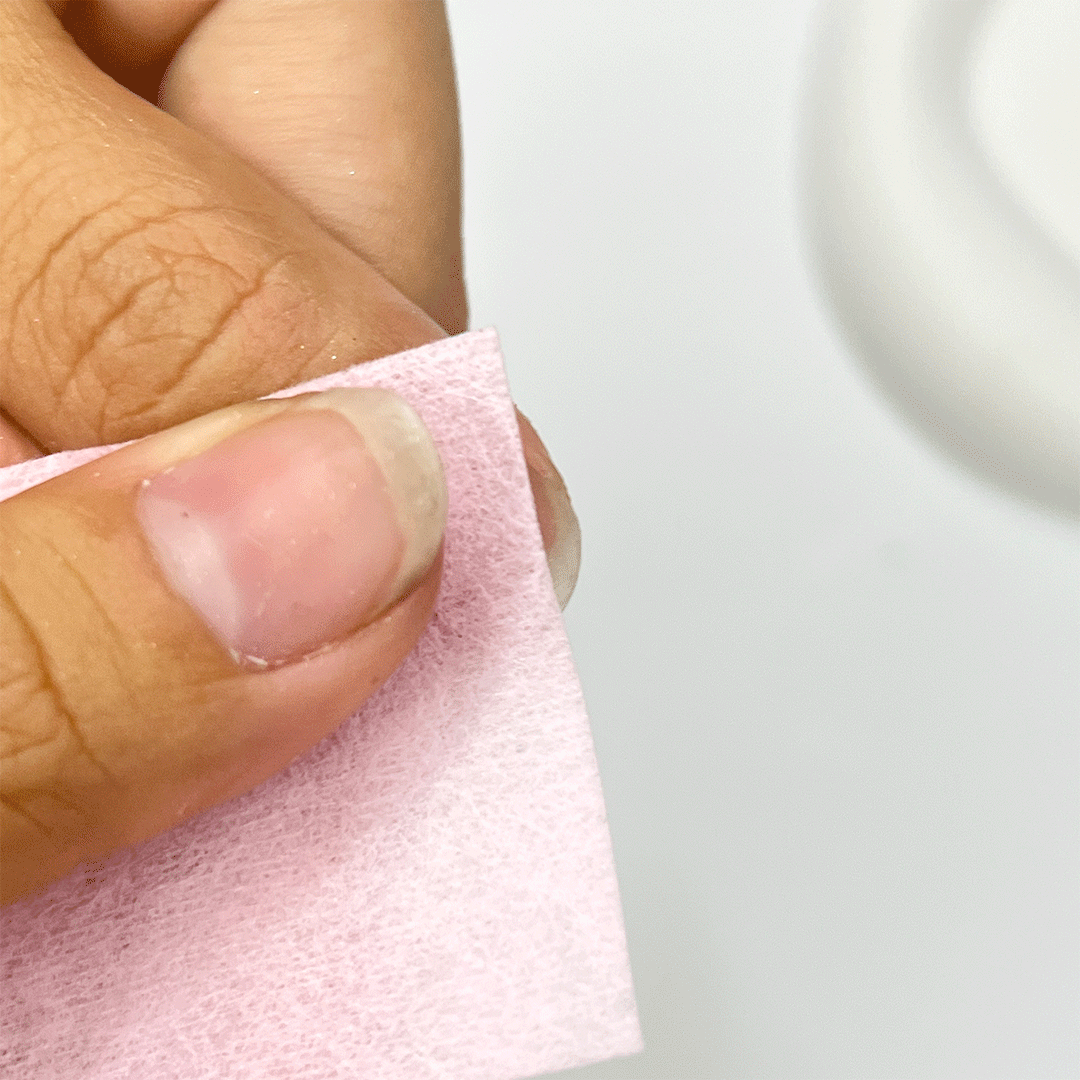
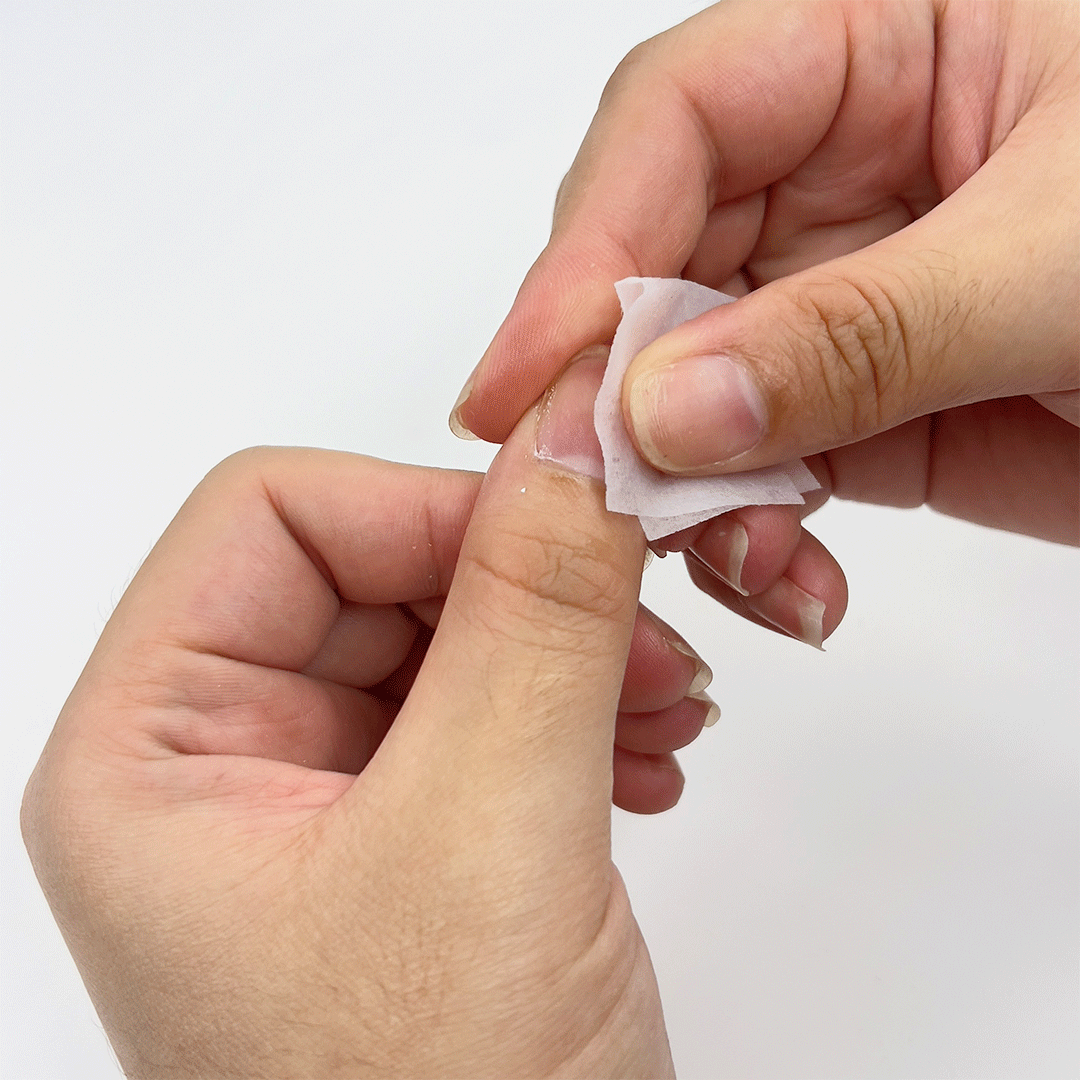
Step 2 - CLEAN
Just as important as the first step, make sure all dust is completely removed from your nails.
-
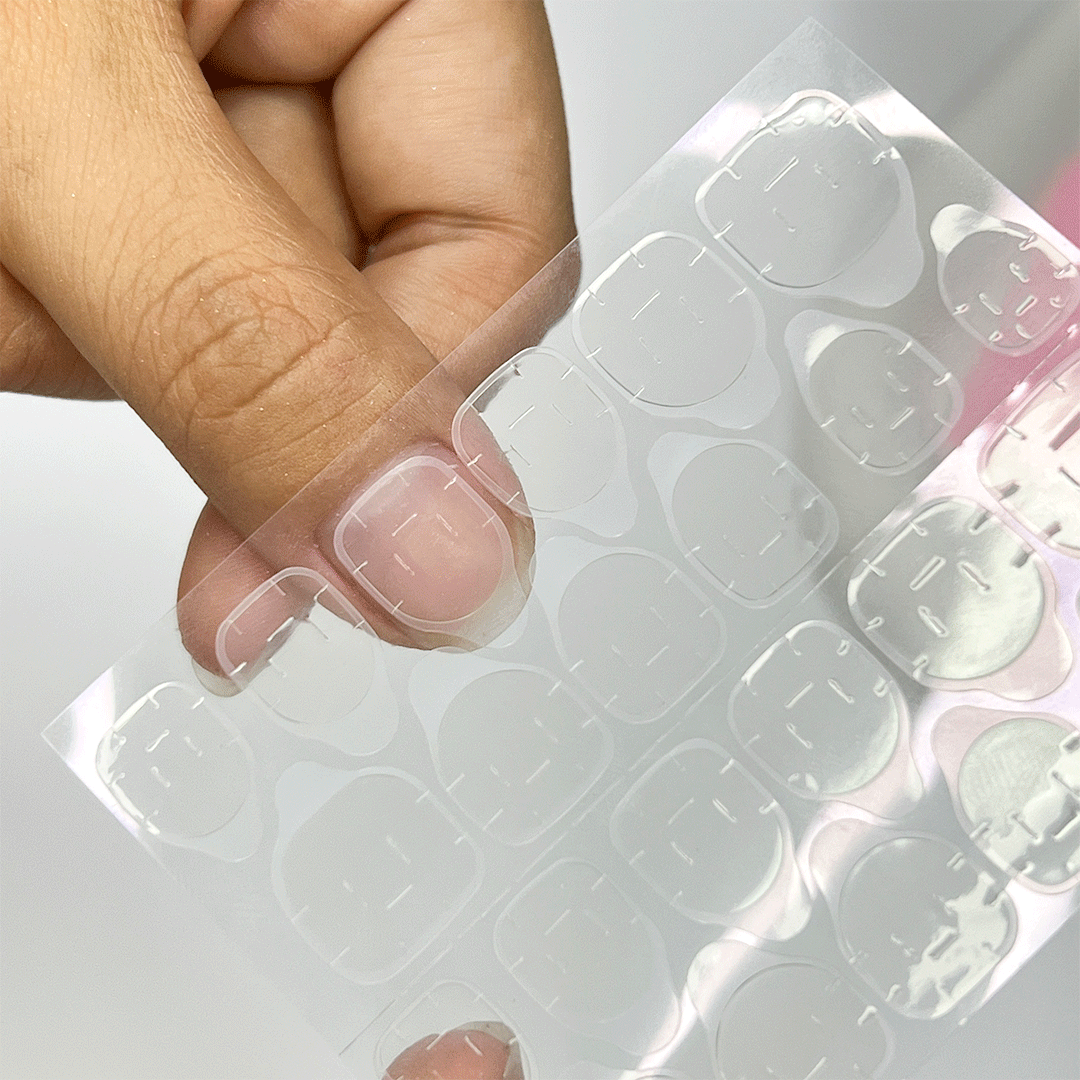
Step 3 - PREPARE
Measure and choose the right adhesive tab size (adhesive tabs should be slightly smaller than your nail bed)
-
Step 4 - APPLY
Apply adhesive tabs to your nails.
-
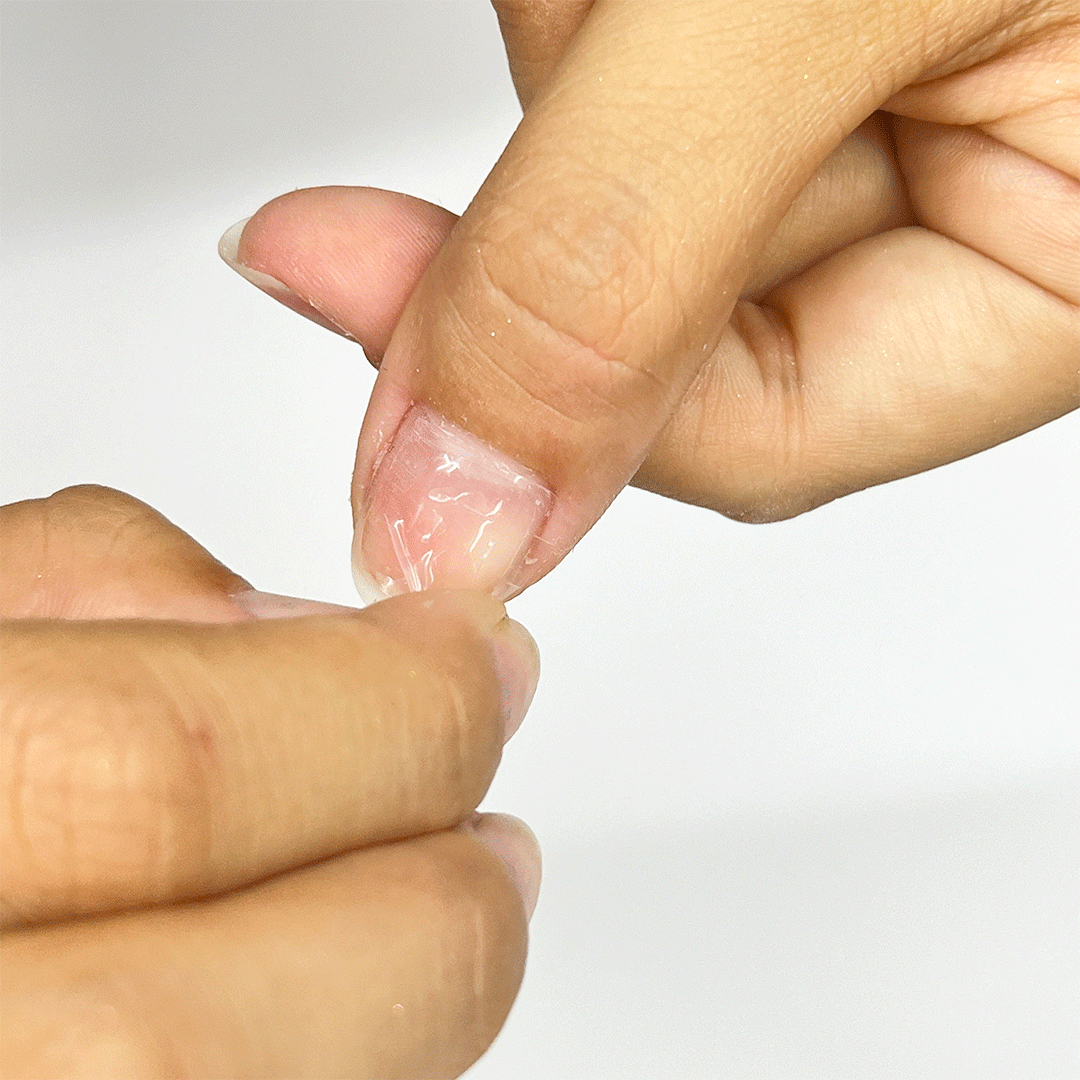
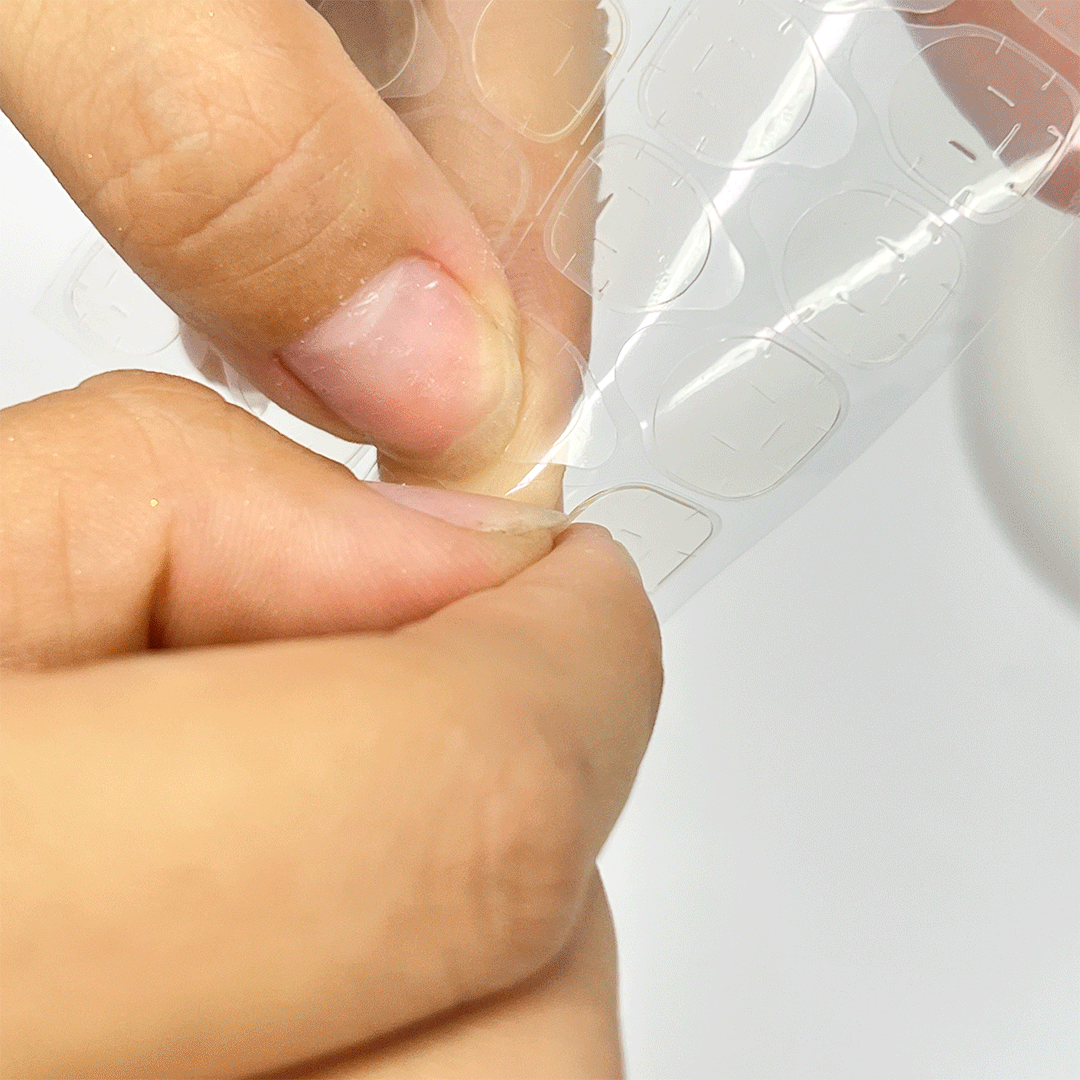
Step 5 - PEEL
Peel off the adhesive tabs' plastic cover.
-
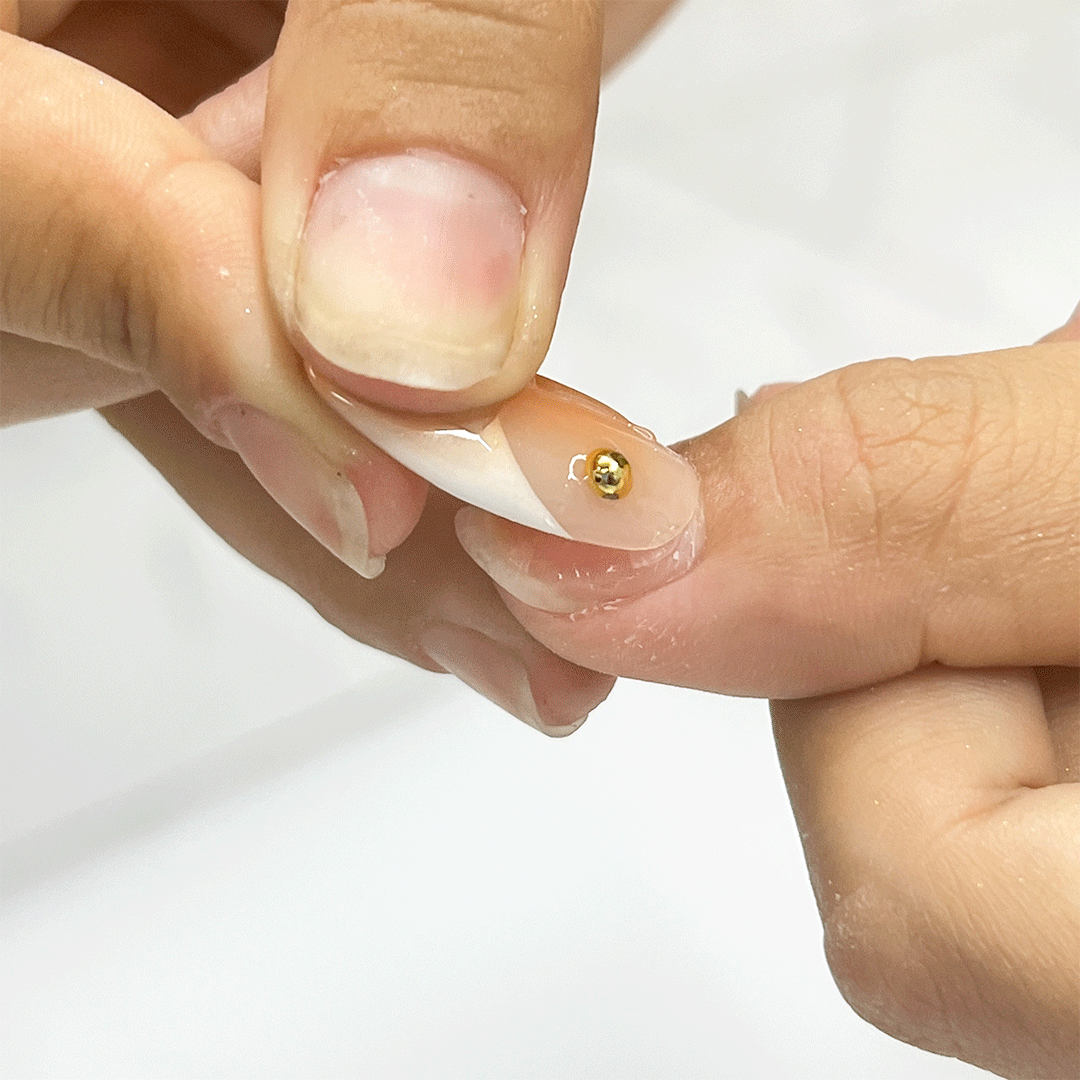
Step 6- APPLY
Place the nails at 45-degree & press down for 10 seconds. Repeat the process to all of your nails.
INFO & TIPS
This method will make your nails last for 1-2 days, making it suitable for events, parties, etc.
Avoid water contact for at least 2 hours after application to ensure longer wear.
Use a hairdryer to heat the sticky tabs for 5 seconds after applying them to your nails. This makes the adhesive work extremely well!
Apply Press On Nails with Nail Glue
-
Step 1 - FILE
File your nails, ensuring the entire nail bed is filed to create a rough surface. This step is crucial for helping your nails stay on longer.
-
Step 2 - CLEAN
Just as important as the first step, make sure all dust is completely removed from your nails.
-
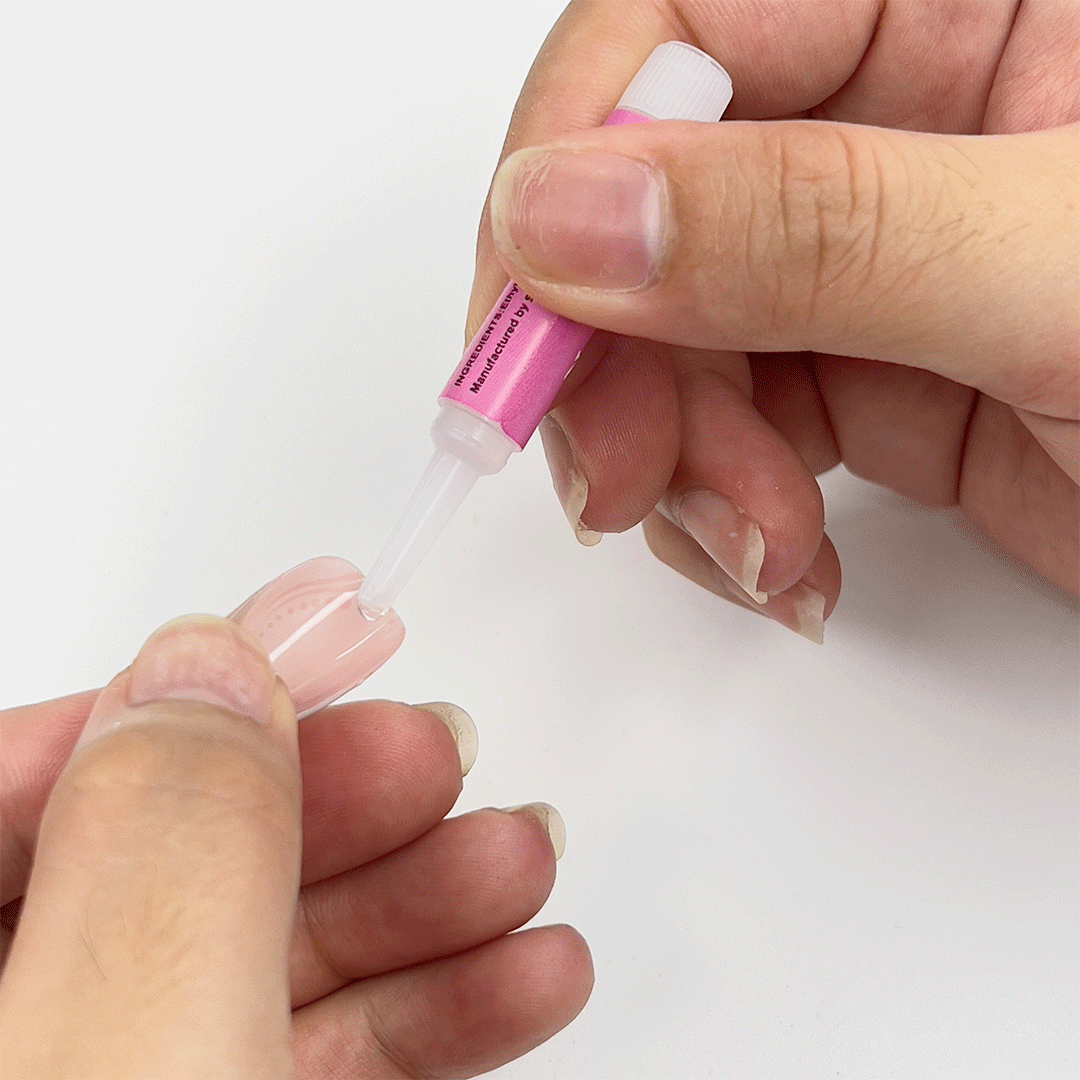
Step 3 - GLUE
Put a pea-size amount of gel glue on the back of the nails
-
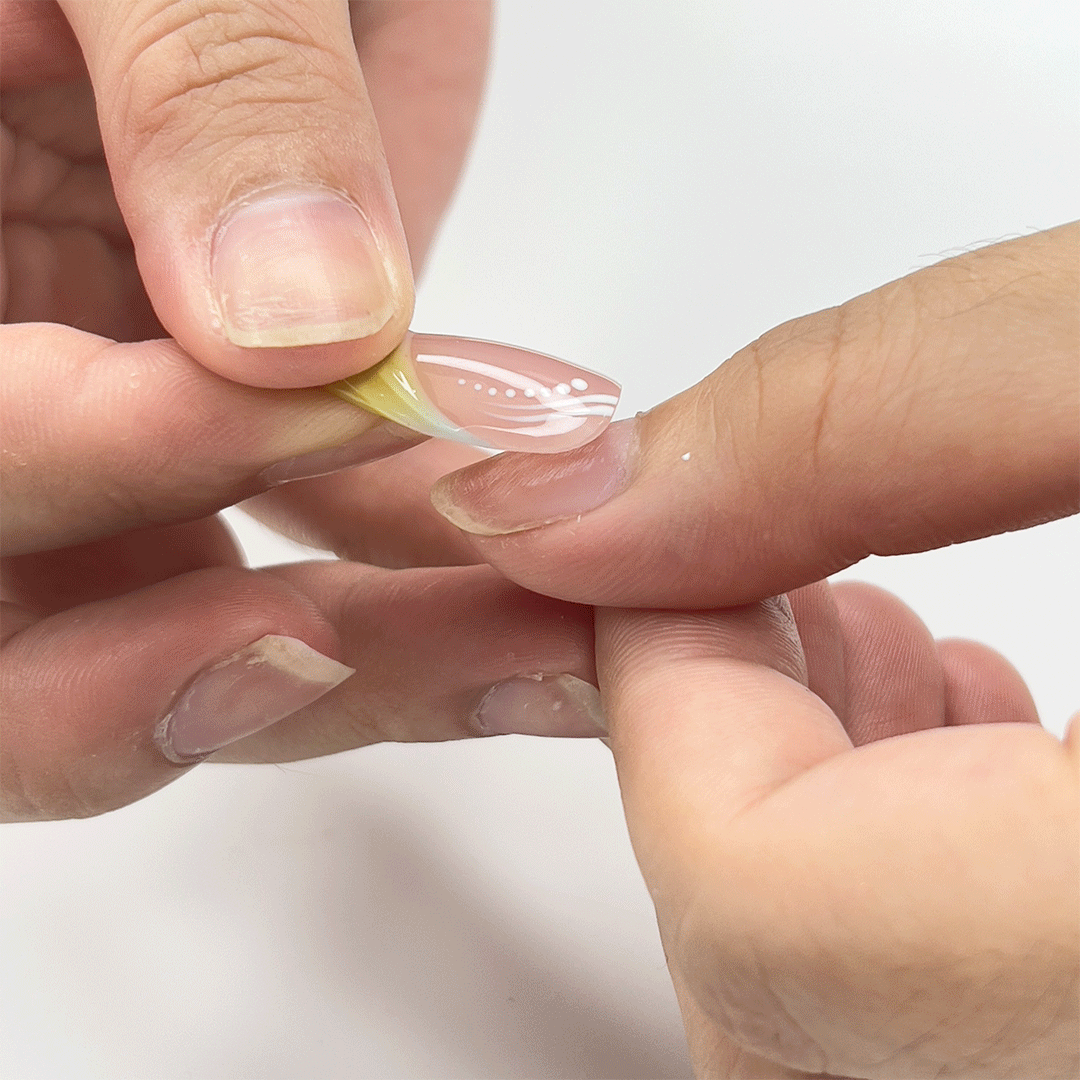
Step 4 - APPLY
Place the nail at a 45-degree angle and press down. Hold the nails for at least 30 seconds. Repeat the process to all of your nails
